Sunday, August 14, 2016

Pokeball Free Crochet Pattern

Pokeball Free Crochet Pattern

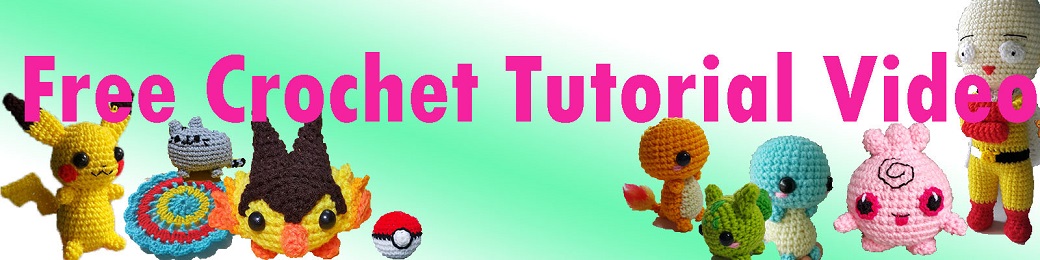
It's Pokemon Go fever, everybody around me talking and playing Pokemon Go. Then why don't make some pokeballs. This is my version of pokeball. Simple pattern, no special stitches need. The size is really good for making a key chain. I hope you guys like this.


Pattern Notes
-sc = single crochet
-sl = slip stitch
-ch = chain
-sc2tog = decrease
-invdec = invisibla decrease

Material: 4 ply worsted weight yarn
I used local brand named "eagle"
3.5mm. hook, I used 6/0 japanese tuplip hook.

Pattern instruction 


[Video Tutorial ]

Pokeball
Start with white yarn.
Rnd1: 2 ch, 6 sc in the 1st chain, sl :: 6 stitches
Rnd2: 1 ch, [2 sc in next stitch] 6 times, sl :: 12 stitches
Rnd3: 1 ch, [sc in next stitch, 2 sc in next stitch] 6 times, sl :: 18 stitches
Rnd4: 1 ch, [sc in next 2 stitch, 2 sc in next stitch] 6 times, sl :: 24 stitches
Rnd5: 1 ch, [sc in next 3 stitch, 2 sc in next stitch] 6 times, sl :: 30 stitches
Rnd6: 1 ch, sc in next 30 stitch, sl :: 30 stitches
Rnd7: 1 ch, sc in next 30 stitch, sl :: 30 stitches
Change to black yarn
Rnd8: 1 ch, sc in next 30 stitch, sl :: 30 stitches
Change to red yarn
Rnd9: 1 ch, sc in next 30 stitch, sl :: 30 stitches
Rnd10: 1 ch, sc in next 30 stitch, sl :: 30 stitches
Rnd11: 1 ch, [sc in next 3 stitch, invdec] 6 times, sl :: 24 stitches
Rnd12: 1 ch, [sc in next 2 stitch, invdec] 6 times, sl :: 18 stitches
Rnd13: 1 ch, [sc in next stitch, invdec] 6 times, sl :: 12 stitches
Rnd14: 1 ch, [invdec] 6 times, sl :: 6 stitches
Fasten off.

Stuff the fiber tightly, so when the time pass, your pokeball don't turn into sloppy ball.

Button
Rnd1: 2 ch, 5 sc in the 1st chain, sl :: 5 stitches
Fasten off.

Button's ring
4 ch, sl join the chain into circle.
Rnd1: 1 ch, [2 sc in next stitch] 5 times, sl :: 10 stitches
Change to black yarn
1 ch, sl all around.
Fasten off.

Put the button part over button's ring part and sew everything together. Then put this button set on the pokeball itself and sewing them to attach. If you don't like the idea of sewing, you can also glue them, but be careful not to put too much glue, so it not clearly visible and reduce chance to dirty other part.

That's it. If you face any problems during crochet him leave the comments under the video, I will answer you as fast as I can. And we can share the solution with others.

--------------------------------
FOLLOW ME ON

FACEBOOK: https://www.facebook.com/pianosound
Instagram: https://www.instagram.com/amigurumipianosound/
BLOGGER : https://amigurumipianosound.blogspot.com/
--------------------------------
SUPPORT this channel through:
Patreon :https://www.patreon.com/AmigurumiPianosound

Or purchase my paid pattern at
Craftsy : https://www.craftsy.com/user/2234916/pattern-store
ETSY: https://www.etsy.com/shop/Pianosound
RAVELRY : http://www.ravelry.com/patterns/sources/noramon-drons-ravelry-store/patterns


Monday, August 8, 2016

Pokemon Igglybuff- ププリン - Pupurin Free crochet pattern

I come up with this Igglybuff, because I feel bore during try to setting my laptop. I look around and saw pink yarn ball. Then I realize I should crochet something pink. And now the Pokemon Go is really famous, why don't do another pokemon. At first I was thinking of Jigglypuff instead, but later I realize I don't have blue yarn around. And I was too lazy to went to my yarn storage room. So I decided to devolution it to the Igglybuff.

Pattern instruction


Hair1(Make 1 piece)
Rnd1: 2 ch, 6 sc in the 1st chain, sl :: 6 stitches
Rnd2: 1 ch, [sc in next stitch, 2 sc in next stitch] 3 times, sl :: 9 stitches
Rnd3: 1 ch, sc in next 9 stitch, sl :: 9 stitches
Fasten off.

Hair2,3(Make 2 pieces)
Rnd1: 2 ch, 6 sc in the 1st chain, sl :: 6 stitches
Rnd2: 1 ch, [sc in next 2 stitch, 2 sc in next stitch] 2 times, sl :: 8 stitches
Rnd3: 1 ch, sc in next 8 stitch, sl :: 8 stitches
Fasten off.

Connect 3 Hairs pieces together by crochet Rnd4, with hair2 on left, hair1 on middle, hair3 on right.
Rnd4: 1 ch, sc2tog, sc to connect, sc2tog, sc to connect, sc2tog 3 times, sc to connect, sc2tog 2 times, sc to connect, sc2tog 2 times, sl :: 13 stitches
Rnd5: 1 ch, sc in next 13 stitch, sl :: 13 stitches
Rnd6: 1 ch, [sc in next stitch, 2 sc in next stitch] 6 times, sc in next stitch, sl :: 19 stitches
Rnd7: 1 ch, [sc in next 2 stitch, 2 sc in next stitch] 6 times, sc in next stitch, sl :: 25 stitches
Rnd8: 1 ch, [sc in next 3 stitch, 2 sc in next stitch] 6 times, sc in next stitch, sl :: 31 stitches
Rnd9: 1 ch, [sc in next 4 stitch, 2 sc in next stitch] 6 times, sc in next stitch, sl :: 37 stitches
Rnd10 - Rnd16: 1 ch, sc in next 37 stitch, sl :: 37 stitches
Rnd17: 1 ch, [sc in next 4 stitch, sc2tog] 6 times, sc in next stitch, sl :: 31 stitches
Rnd18: 1 ch, [sc in next 3 stitch, sc2tog] 6 times, sc in next stitch, sl :: 25 stitches
Rnd19: 1 ch, [sc in next 2 stitch, sc2tog] 6 times, sc in next stitch, sl :: 19 stitches
Rnd20: 1 ch, [sc in next stitch, sc2tog] 6 times, sc in next stitch, sl :: 13 stitches
Rnd21: 1 ch, [sc2tog] 6 times, sc in next stitch, sl :: 7 stitches
Fasten off.

Arms
Rnd1: 2 ch, 4 sc in the 1st chain, sl :: 4 stitches
Rnd2: 1 ch, sc in next 3 stitch, 2 sc in next stitch, sl :: 5 stitches
Rnd3: 1 ch, sc in next 4 stitch, 2 sc in next stitch, sl :: 6 stitches
Fasten off.

Feet
Rnd1: 7 ch, sc on 2nd stitch from hook, sc in next 4 stitch, 3 sc in next stitch, sc in next 4 stitch, 2 sc in next stitch, sl :: 14 stitches
Rnd2: 1 ch, sc in next 14 stitch, sl :: 14 stitches
Rnd3: 1 ch, sc in next 4 stitch, [sc2tog] 3 times, sc in next 4 stitch, sl :: 11 stitches
Rnd4: 1 ch, sc in next stitch, [sc2tog] 4 times, sc in next 2 stitch, sl :: 7 stitches
Fasten off.

Sewing arms and feet can be annoying job for many people, and if you are not familiar with sewing you doll may not turn out as you want. Tip is to make sure that they are symmetry for both arms and legs. You can also glue them, if you really hate sewing, but be careful not to put too much glue, so it not clearly visible and reduce chance to dirty other part.

Eyes
Black yarn
Rnd1: 2 ch, 6 sc in the 1st chain, sl :: 6 stitches
With pink yarn, sl around the eye.
Fasten off.

Alternative way for making eye, you can either do embroidery, or using some safety eyes. Or if you have felt sheet, cut it into circle and sewing or glue them to make eyes.


Also for the mouth, if you don't like the idea of embroidery, I recomment felt sheet, cutting it into the shape you want and attach them by glue.

Hope you enjoy the pattern, any problems during making him, comment below or under tutorial video. I will try answer you as fast as I can. :)

If you crochet one of my doll please show me, I would love to see it.
What you want me to crochet next leave the comment below. :)

******SELLING THE DOLL YOU MADE******
Visit private policy for more detail: https://amigurumipianosound.blogspot.co.uk/p/pattern-poly.html
FOLLOW ME ON

FACEBOOK: https://www.facebook.com/pianosound
Instagram: https://www.instagram.com/amigurumipianosound/
BLOGGER : https://amigurumipianosound.blogspot.com/
--------------------------------
SUPPORT this channel through:
Patreon :https://www.patreon.com/AmigurumiPianosound

Or purchase my paid pattern at
Craftsy : https://www.craftsy.com/user/2234916/pattern-store
ETSY: https://www.etsy.com/shop/Pianosound
RAVELRY : http://www.ravelry.com/patterns/sources/noramon-drons-ravelry-store/patterns